Any task you perform by your own hands, whether it is done in small quantities, always seems very much interesting. One such process is to roast a coffee at home. Roasting a coffee at your home will yield the best coffee you have ever tasted. Usually, the most famous brands like Starbucks over-roast it, therefore, every cup of coffee tastes the same and the unique taste of the is extracted away from the coffee. But if you roast the coffee at home, you will have the flavors that you have never tasted before.
Steps for Roasting Coffee at Home
1. Purchasing the unroasted green beans
The first thing you should be doing before you start roasting your beans is to purchase some raw coffee beans. While purchasing the green beans you should be careful that you don’t taste the raw coffee bean because these beans are hard as a rock and as a result, your teeth may break. You can purchase the coffee from the local shop or you can search for some on the internet. One thing that you should look out for is that when you purchase those raw green beans you should know that when you roast beans they increase their size and lose half of their weight. This means that if you purchase 1 pound of beans, then after roasting their weight will become 0.5 pounds. Therefore we would recommend you purchase 2 pounds of raw beans so you can get 1 pound roasted beans. Another thing is that every bean has its unique test so before buying the beans you should do a little bit of research first.
2. Get the equipment for roasting
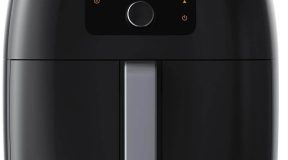
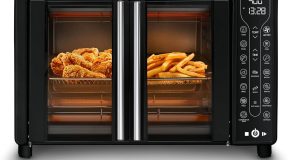
Usually, commercial coffee companies use huge industrial roaster for yielding large amounts of roasted coffee. To roast your coffee at home you don’t need to purchase any kind of expensive equipment for roasting the coffee beans. Even without spending much money, you can get yourself a coffee roaster for your home. A piece of equipment resembling the usual popcorn popper is an ideal choice because it has the heating power of 450 degrees similarly like the popcorn popper. If you don’t want to purchase a popper or if you don’t have a popper then you can use a cast-iron skillet, whirley-pop or a metal mixing bowl and heat gun. If you are using the metal bowl for roasting then you will also have to purchase oven mitts or a pair of gloves, and a wooden spoon for stirring the beans. In short, popcorn popper and iron skillet are the perfect equipment for roasting beans.
3. Begin roasting
One benefit of self-roasting your beans at home is that while roasting you will have complete control over the boldness of the flavor level of caffeine you prefer. First of all dump the raw beans in the heating equipment, turn on the heat and start stirring. While heating you will notice that the colors of the beans start changing from yellow to green and. Soon the color of the beans changes to light brown and you hear a cracking sound of the beans similar to that of popcorn popping. This sound is referred to as the first crack and it shows up when you start seeing the chaff. If you are using a popcorn popper for roasting then its chaff will rise and come out automatically but if you are using any other method for roasting then you should it off the top.
4. Pull the beans out when they are dark
If you prefer having a light flavor or city roast then you should quit the roasting process as soon as you listen to the sound of the “first crack”. But if you want to have it darker or Viennese or French roast then you should wait for a couple of minutes more until you get the French roast. While roasting you should not get the beans black because they are like charcoal and their taste is just pathetic and there is a risk that an inferno may start in your machine.
5. Cooldown the roasted beans
After you have reached your desired roasting level you should remove the beans from the equipment and then cool them for a few hours. The cooling of the beans depends on you that how you do it. There are various ways in which you can cool them like laying them in the cookie sheet or swooshing them between two metal strainers. While cooling them down you should be careful and take all the safety precautions because when you pull them they will extremely hot and if they fall on you, you may get yourself burned.
6. Put them in a container sometimes and then start brewing
After you have cooled down the beans you should put them in an airtight container for a couple of days but make sure that you don’t seal the lid completely because the container may explode as the beans release carbon dioxide. After this, they are ready for brewing but we would recommend you use them within the next 5 days so that they don’t lose their freshness and you can enjoy a delicious and tasty coffee.
Conclusion
Roasting your coffee at home is quite more satisfying as compared to buying a bag of roasted beans from your near supermarket. If you roast at home you will be satisfied that the roasted bean you will be yielding are fresh than the ones available in the supermarket because the flavor of the roasted beans last for maximum 24 hours after they have been roasted. Another thing about roasting coffee is that you are free to choose the beans you want this is not the case if you purchase one. And you are also free to decide how you will roast the beans like will you have a light roast, medium roast or a dark roast. In short, roasting coffee at home is fun and it gives you a sense of satisfaction too.


